
10 Tips for Shooting with the Album in Mind
above photos by Caroline Logan Photography / Click here to view full design.
The longer I'm a photographer, the more I realize that shooting for the album is where it's at. Not only am I the founder of Align, I'm also a pro wedding photographer, and through both my experience as a photographer, and our experience here at Align designing thousands of albums, I've learned that shooting with the end product in mind is just plain smart. It makes our albums SO much prettier AND helps us as artists to better tell a cohesive, powerful story. Today I thought I'd share 10 tips for how to shoot with the album in mind. Some of these tips will only apply to wedding photographers, but most of them will also translate well for portrait photographers. The more we can keep these principles top of mind during a shoot or wedding day, the happier we will be with our albums, and the more they will sell themselves.
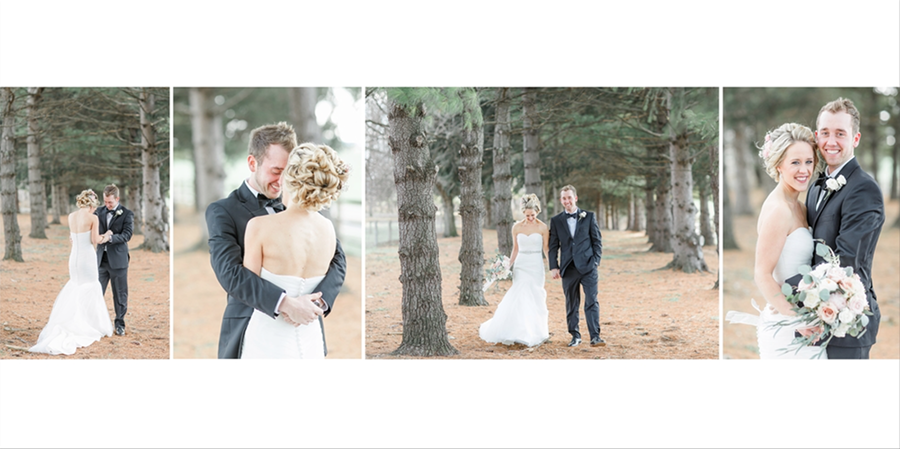
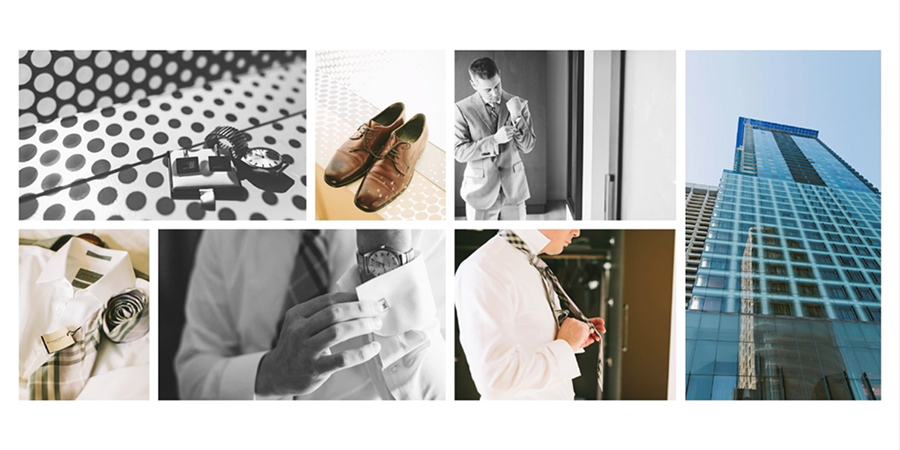
1 -- Shoot both horizontal and vertical in each setting
This is as basic as you get, but it's EXTREMELY helpful when you sit down to design an album or you order a design from Align. A combination of horizontal and vertical images from each setting will provide more possibilities and variety for each spread while keeping the design cohesive. I know for most photographers -- myself included -- we either favor horizontal or vertical images heavily (I end up shooting WAY more verticals), so if that's you, just make a conscious effort to ensure that you take a few of the other orientation at each location. Above and below are some examples from our clients of spreads that came together REALLY well as a result of this practice.
The longer I'm a photographer, the more I realize that shooting for the album is where it's at. Not only am I the founder of Align, I'm also a pro wedding photographer, and through both my experience as a photographer, and our experience here at Align designing thousands of albums, I've learned that shooting with the end product in mind is just plain smart. It makes our albums SO much prettier AND helps us as artists to better tell a cohesive, powerful story. Today I thought I'd share 10 tips for how to shoot with the album in mind. Some of these tips will only apply to wedding photographers, but most of them will also translate well for portrait photographers. The more we can keep these principles top of mind during a shoot or wedding day, the happier we will be with our albums, and the more they will sell themselves.
1 -- Shoot both horizontal and vertical in each setting
This is as basic as you get, but it's EXTREMELY helpful when you sit down to design an album or you order a design from Align. A combination of horizontal and vertical images from each setting will provide more possibilities and variety for each spread while keeping the design cohesive. I know for most photographers -- myself included -- we either favor horizontal or vertical images heavily (I end up shooting WAY more verticals), so if that's you, just make a conscious effort to ensure that you take a few of the other orientation at each location. Above and below are some examples from our clients of spreads that came together REALLY well as a result of this practice.
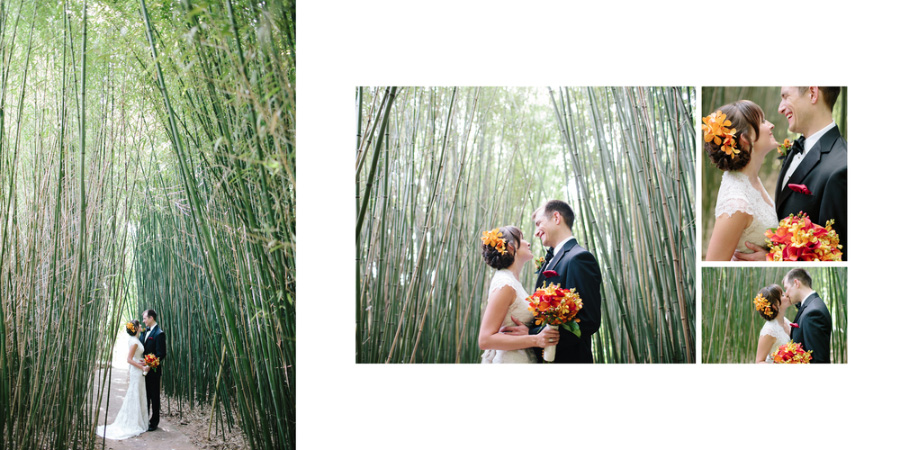
above photos by Angela Newton Roy Photography / Click here to view full design.
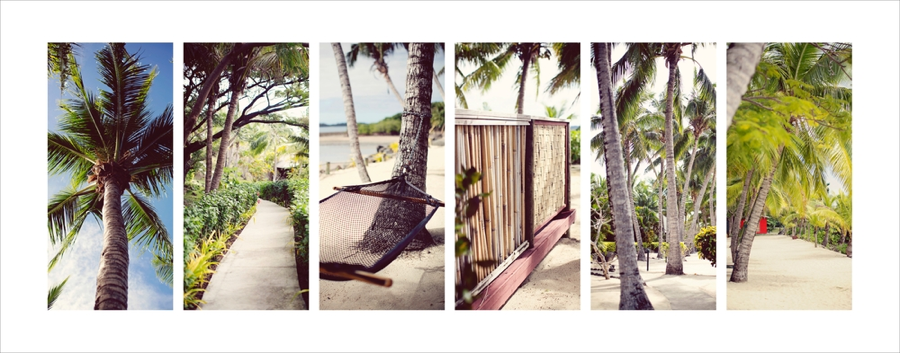
above photos by Caroline Logan Photography / Click here to view full design.
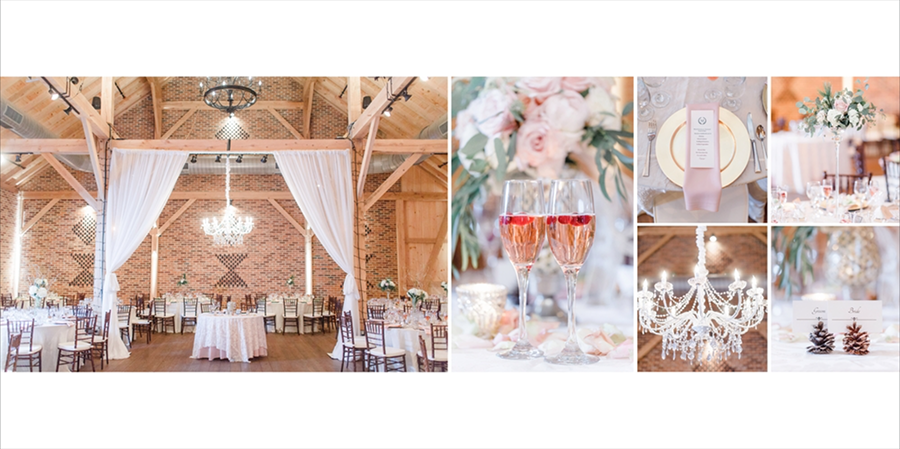
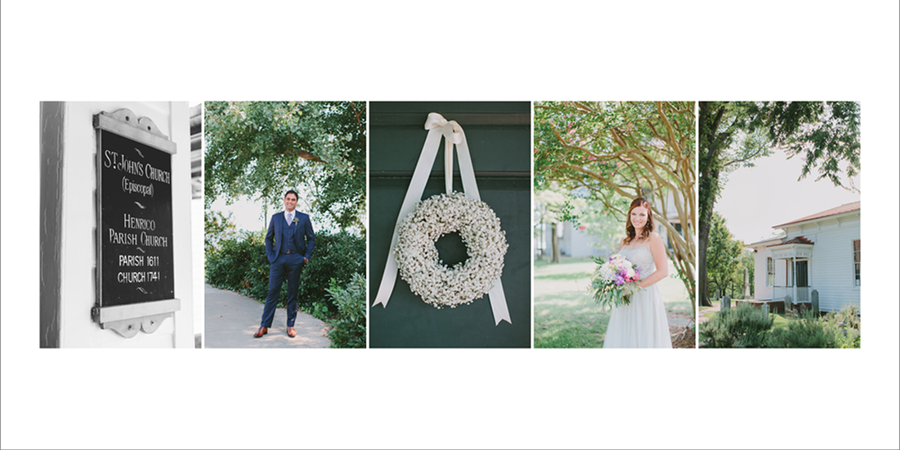
2 -- Take scene-setting photos of the location
This is the #1 thing that helps fill out the story of a design, but that most photographers neglect to do. We take detail photos of bouquets, place settings, bridal details, but we forget to take detail photos of the location. And this is something EVERY photographer can do regardless of how high-end or detail-heavy the wedding you are shooting is. Since wedding days are usually a whirlwind of events, one thing that works well for me is to arrive a half hour early to the venue. As I scout for first look and portrait locations, I take my camera with me and take 10-15 scene-setting details that capture the aesthetic of the venue. These can include a wide shot of the building, a sign, close ups of the foliage, architecture, etc. The client picked their venue for a reason, and so it only makes sense to capture a few photos to show off what makes it unique. And these images really come in handy when filling out the story of a wedding day. Here are a few spreads that are great examples of this idea:
above photos by Abby Grace Photography / Click here to view full design.
above photos by Leezett Photography / Click here to view full design.
above photos by Tori Watson Photography / Click here to view full design.
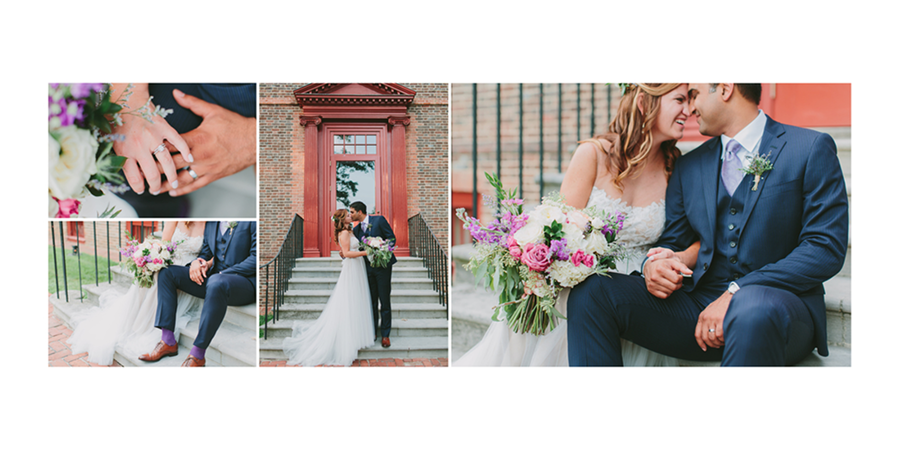
3 -- Tell a color story when styling the bridal details
We all love photographing the dress, shoes, rings and jewelry. Bridal details are a must-have for any wedding album design. These images usually appear early-on in a design, so it's a good idea to think of them as a first act -- a taste of what is to come. In order to keep a spread with bridal details cohesive in itself AND with the rest of the album, it's helpful to style them using consistent backgrounds and to keep in mind the color-story of the wedding. One easy way to do this is to use a bridesmaid dress as a shooting surface for smaller details. That way you are able to bring the wedding colors into the album early on. These next two spreads are a good example of superb bridal detail styling:
3 -- Tell a color story when styling the bridal details
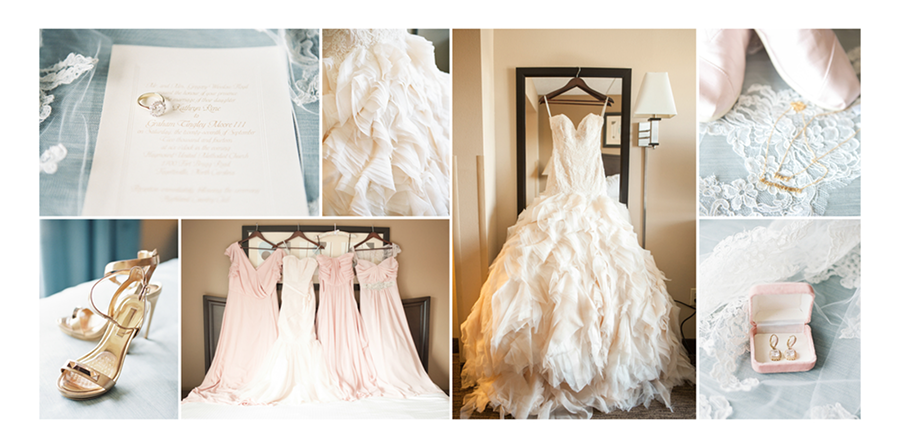
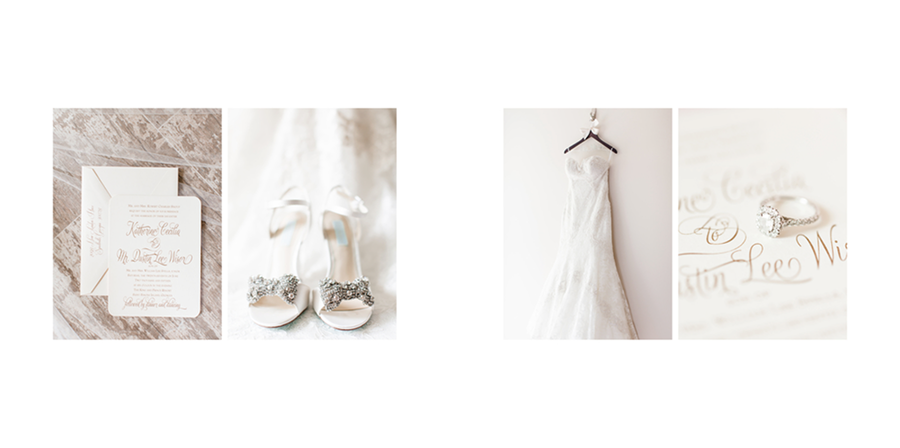
We all love photographing the dress, shoes, rings and jewelry. Bridal details are a must-have for any wedding album design. These images usually appear early-on in a design, so it's a good idea to think of them as a first act -- a taste of what is to come. In order to keep a spread with bridal details cohesive in itself AND with the rest of the album, it's helpful to style them using consistent backgrounds and to keep in mind the color-story of the wedding. One easy way to do this is to use a bridesmaid dress as a shooting surface for smaller details. That way you are able to bring the wedding colors into the album early on. These next two spreads are a good example of superb bridal detail styling:
above photos by Allison Mannella Photography / Click here to view full design.
above photos by Anna Shackleford Photography / Click here to view full design.
4 -- Don't forget the groom!
Unfortunately, many times, the groom gets less coverage in the design. As a photographer, I know the timeline doesn't always permit me to capture groom details, but whenever possible, it's a good idea to plan an opportunity to shoot them into the timeline. That way you can produce a spread that shows off the leading man in a way that is comparable in quality to the bride.
above photos by Persimmon Images / Click here to view full design.
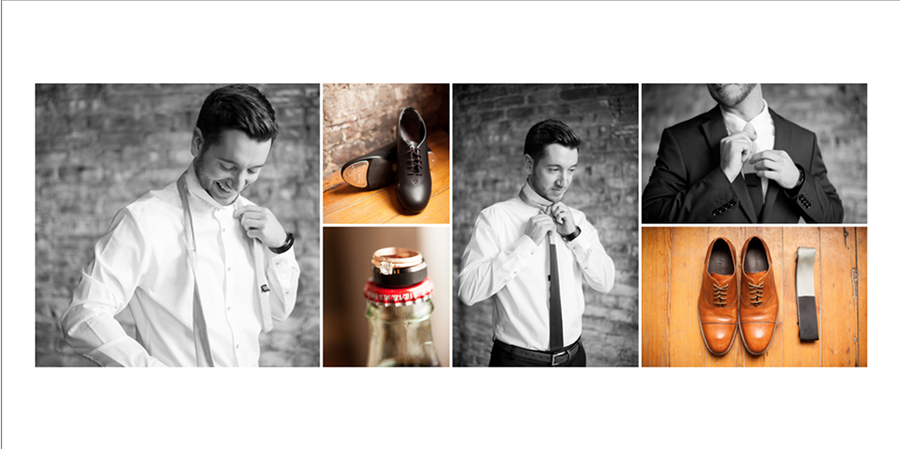
above photos by Kaitlyn Phipps Photography / Click here to view full design.
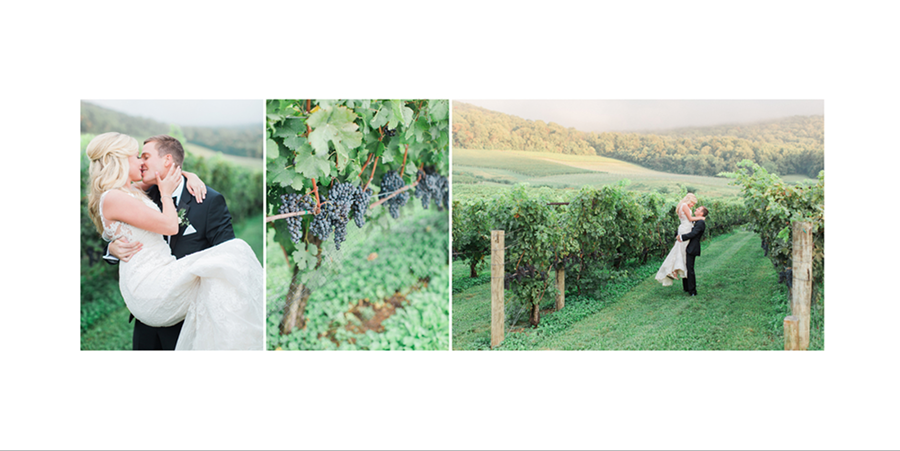
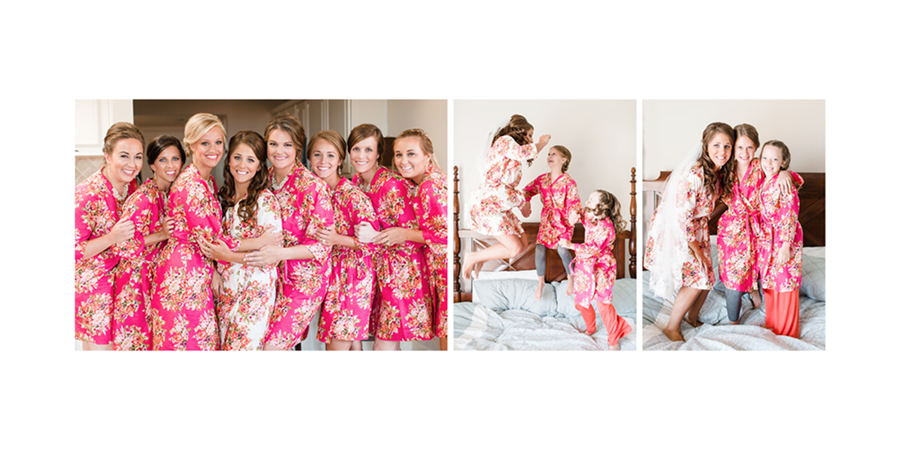
5 -- Take wide and tight shots in each location
Album designs are most beautiful when each spread is made up of photos from the same location, with the same colors and lighting. So make sure that you take your time at each spot and change it up! If you are photographing a group portrait of the bridesmaids in their getting-ready robes, make sure that's not the only photo with those robes in it. And when shooting a couple, make sure you get some wide shots in each setting and then get in tight to capture a detail of how they are holding hands, or an accessory the bride is wearing. These close-ups really add variety and interest to portrait spreads and when taken in the same location as the wide shots, they make for beautiful, cohesive spreads that tell a story.
above photos by Anna Schackleford Photography / Click here to view full design.
above photos by Leezett Photography / Click here to view full design.
above photos by Tori Watson Photography / Click here to view full design.
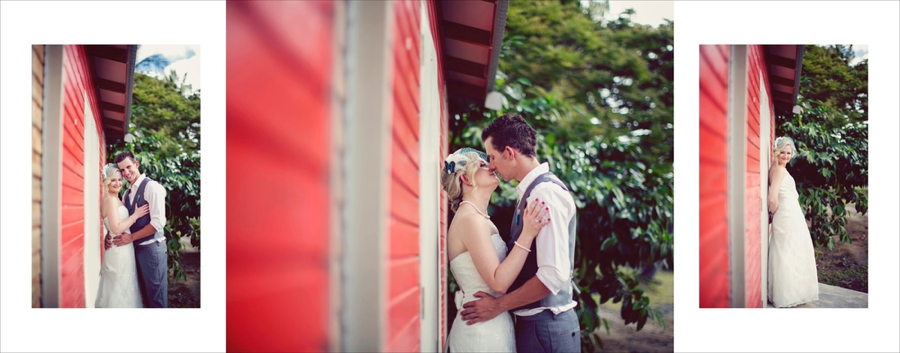
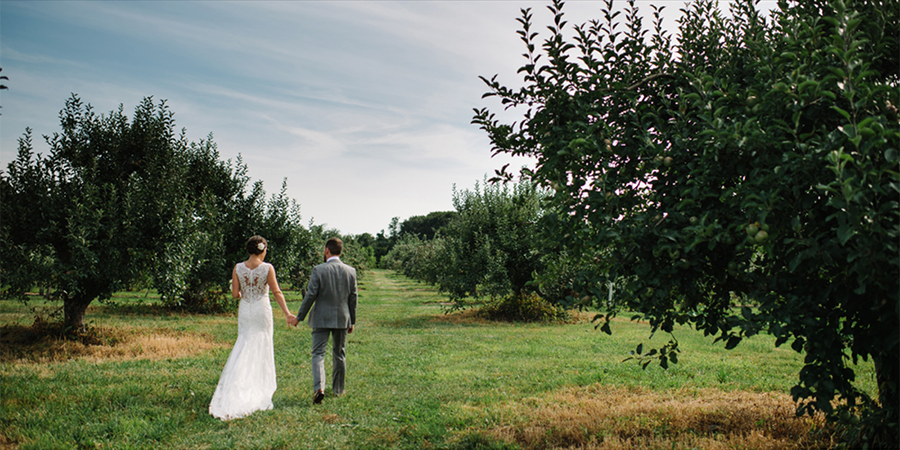
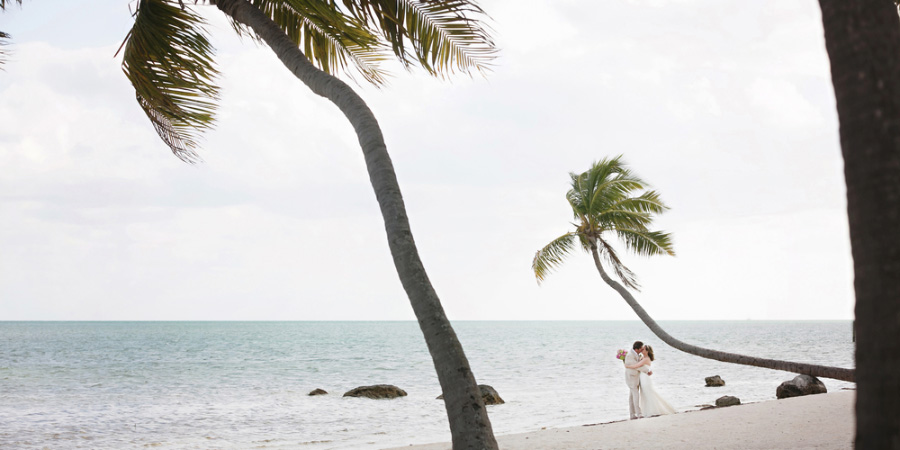
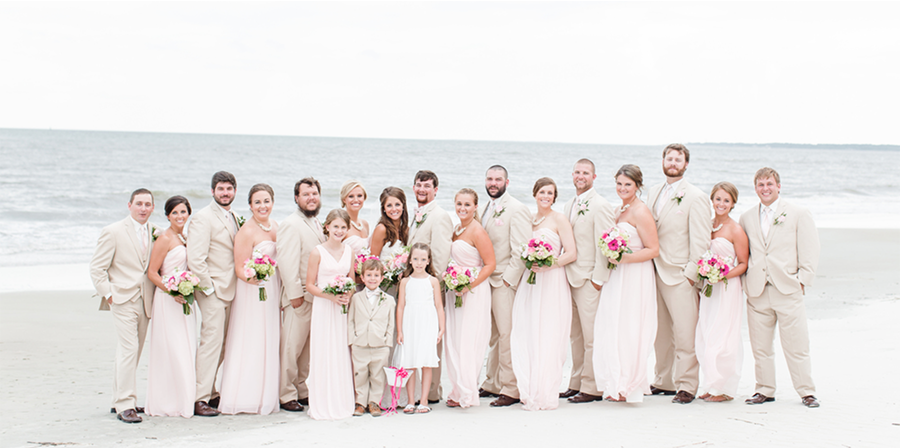
6 -- Mind the gutter
Not all photographers love a powerful spread with one full-bleed horizontal image. But if you're like me and you DO, make sure you are intentional during your portrait time and take a number of wide shots with the couple off to one side so that the gutter won't cut through them in the design. I just love the drama that a spread like this adds to an album design!
above photo by Caroline Talbot Photography / Click here to view full design.
above photo by Julie Wilhite Photography / Click here to view full design.
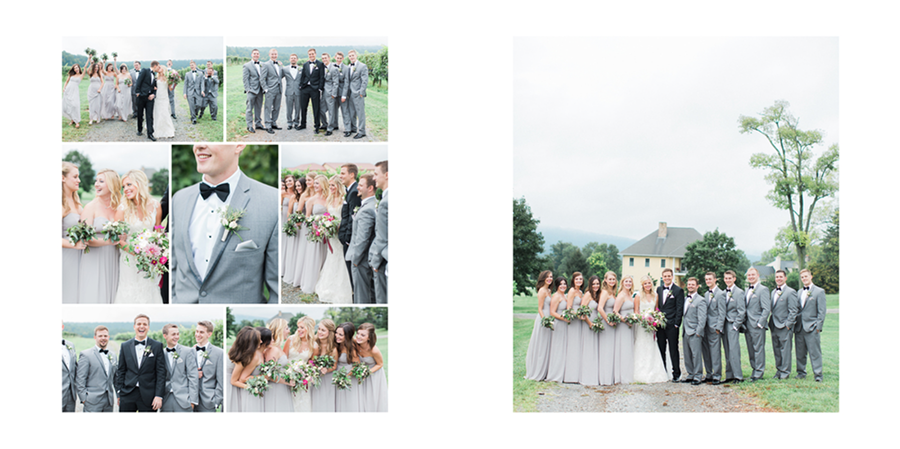
7 -- Shoot bridal party portraits and family portraits all in one location.
Typically bridal party portraits are grouped together in 1-3 spreads in an album design and family portraits take up 1-2 spreads. You don't need to shoot the bridal party in the same location as the family, but it's helpful if you stay in one spot for the entirety of the bridal party photos and then another spot for family. Doing this makes for gorgeous, cohesive spreads like these:
above photos by Abby Grace Photography / Click here to view full design.
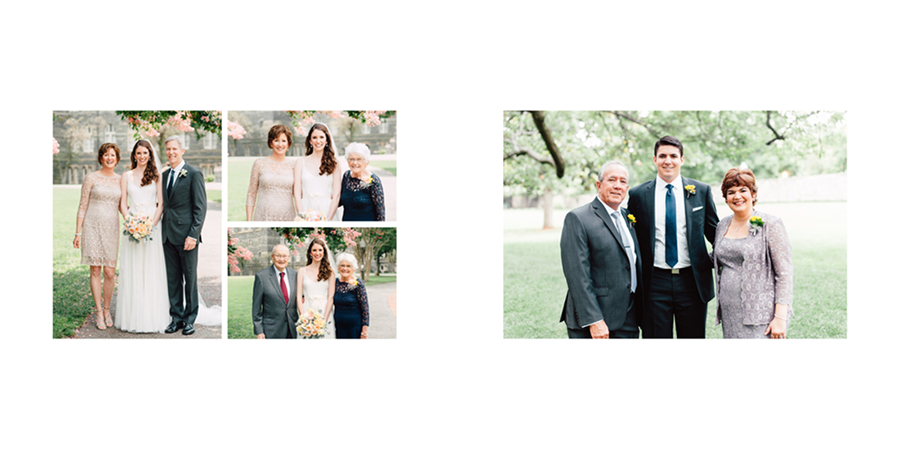
above photos by Rebekah J Murray Photography / Click here to view full design.
8 -- Look for simple backgrounds
We don't always get the chance to choose our backgrounds as photographers, but when we do, it's helpful to keep them simple. The more images you put on a spread, the busier it becomes. And if you have many photos all with busy backgrounds, it will confuse the viewer's eye and make the spread look messy and muddled. So whenever possible, choose simple over busy. And if you do have a busy background, shoot at a lower aperture whenever possible to blur out the background and allow your subject to pop.
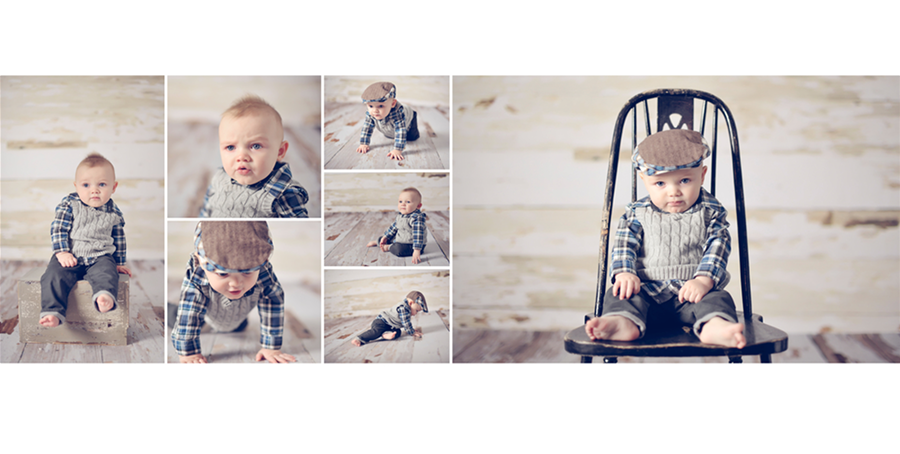
above photos by Jenny Lee's Photography / Click here to view full design.
above photo by Anna Shackleford Photography / Click here to view full design.
9 -- Shoot for the story
Each spread in an album design should tell an individual story, much like a chapter in a book. So for example, when you are shooting the toasts during a wedding reception, try to photograph not only the individuals giving the toast, but the reactions on the faces of the bride and groom, reactions from guests, and a close up of clinking glasses. It's a lot to cover, so making a game-plan with your 2nd shooter to decide who is going to cover what ahead of time can be helpful. But having a wide variety of images to tell the story for each part of the day is so powerful when it comes to putting together the album design.
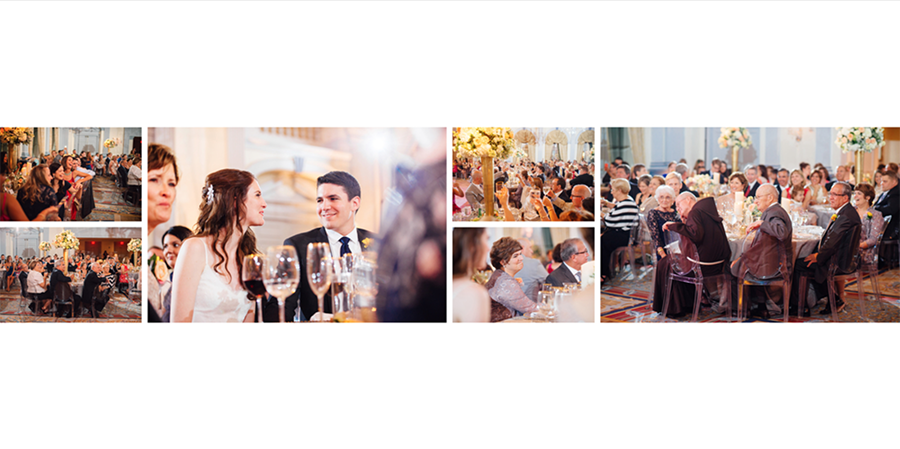
above photos by Rebekah J Murray Photography / Click here to view full design.
10 -- Keep the end in mind
Every book needs a powerful conclusion -- a cathartic note that wraps everything up and makes you feel that all is right with the world. If your album ends with a single page (or half-spread), it is especially important to think through the ending when you are shooting since you will only have a limited amount of space with which to conclude the story. If you are shooting an exit or fireworks, those are obvious end notes to a wedding day story. But if you aren't staying for the exit, make sure you have a good portrait of the couple with which to end. Portrait images that work well for a last page of an album design include the couple walking away, a silhouette image, or some type of night shot with ambient or back lighting. This is SO crucial because you can have a GORGEOUS design, but if you don't have a powerful image to end with, it can feel unfinished.

above photo by Erin Wallace Photography / Click here to view full design.

above photo by Caroline Talbot Photography / Click here to view full design.
Approaching your weddings and portrait shoots with the album in mind can take a paradigm shift of sorts, but when you begin to think in these terms, it becomes easier and easier, and soon it's second nature. It is definitely worth the extra effort to implement a few of these tips because the finished albums that result will make you more proud of your finished product, make your clients fall even more in love with you and your work, and serve as powerful examples of the stories you can tell for future clients.
Approaching your weddings and portrait shoots with the album in mind can take a paradigm shift of sorts, but when you begin to think in these terms, it becomes easier and easier, and soon it's second nature. It is definitely worth the extra effort to implement a few of these tips because the finished albums that result will make you more proud of your finished product, make your clients fall even more in love with you and your work, and serve as powerful examples of the stories you can tell for future clients.
If you found this post helpful and would like to receive tips like this straight to your inbox, click here to sign up!

And exciting news! If you're a photographer who wants to start offering albums without investing hours of guesswork and trial and error -- we have a solution for you! Check out the Album Start-Up Kit and start maximizing your profit today!

-----------
Blog post written by: Melissa Jill
Blog post written by: Melissa Jill
Garden-inspired Jewish Wedding album design for Rebekah J Murray
Virginia-based wedding and editorial photographer Rebekah J Murray is a delight to work with! We have been designing albums for her for 8 years now and her designs have been featured as favorites on our blog here time and time again!
One thing Rebekah has done a great job of is communicating her design preferences. We always keep design preferences for each photographer on file so that we can make sure to nail first drafts no matter which designer is working with them. Rebekah prefers designs that have spreads with lots of negative space balanced by pages with full bleed images...somewhere in between our Classic and Simple design styles.
This particular design was approved with NO REVISIONS and the final files were delivered just 5 days after the order was placed. There were two key things that really facilitated this quick turn-around:
1. Rebekah's communication of her design preferences (see above).
2. Rebekah selected the 'use all images sent' option on her order form AND she carefully curated the image selection she sent us. Photographers can either select for us to use all the images that are sent in the design OR to have the designer select the best images for the design from a selection of images that are sent. Truthfully either option works great, but in this case, the combo of the "use all" option and the fact that Rebekah selected a good amount of photos & didn't have very many one-off images that didn't flow with the rest made for a quick approval with no revisions needed.
Yay for fast turn-arounds and quick approvals!!
We love how this design turned out! Here are a few of our favorite spreads:


To see the design in full, click through the slideshow:
Thank you, Rebekah, for allowing us to work with your beautiful images!
Thank you, Rebekah, for allowing us to work with your beautiful images!
-----------
Design by: Kari (View More) // Design style: Classic (View More) // Blog post written by: Melissa Jill
Design by: Kari (View More) // Design style: Classic (View More) // Blog post written by: Melissa Jill