
Grand Estate Wedding Album Design for Melissa MacDonald Photo + Film
We have had the pleasure of working with New Jersey wedding photographer Melissa MacDonald for the past 4 years. She photographs some of the most grand, beautiful weddings, and we are so excited to show off the most recent design we created for her clients today!
Melissa's work is truly outstanding! She has a unique gift for showcasing her clients in a way that feels both editorial and effortlessly genuine. You can see some of the other designs we've created for Melissa over the years by clicking here.
This particular design was approved with NO REVISIONS from her client, which is a huge compliment to us! We ADORE how it turned out as well! Here are a few of our favorite spreads from this stunning design:


To see the design in full, click through the slideshow:
Thank you, Melissa, for trusting us with your clients and images for so many years!
Thank you, Melissa, for trusting us with your clients and images for so many years!
-----------
Design by: Rachel (View More) // Design style: Classic (View More) // Blog post written by: Melissa Jill
Design by: Rachel (View More) // Design style: Classic (View More) // Blog post written by: Melissa Jill
Late Summer Maryland Wedding Album Design for Anna Lowe Photo
Today we have a beautiful album design to share with you that we put together for the talented Anna Lowe -- a Maryland wedding photographer we have had the pleasure of working with for the past 7 years! Anna loves a more minimal album design style with fewer images per spread and plenty of white space. We too are fans of this design style because it allows each image to shine and not get lost in an over-crowded design!
Anna opted to use our Hands-off Service for this design and that really streamlined the process -- allowing us to directly communicate with her client throughout the revision process.
We love how this late summer Maryland wedding album design turned out -- complete with the cutest white pup, thoughtful details and stunning garden views. Here are a few of our favorite spreads from this beautiful design:


To see the design in full, click through the slideshow:
Thank you, Anna, for trusting us with your images and clients for so many years!
Thank you, Anna, for trusting us with your images and clients for so many years!
-----------
Design by: Rachel (View More) // Design style: Classic (View More) // Blog post written by: Melissa Jill
Design by: Rachel (View More) // Design style: Classic (View More) // Blog post written by: Melissa Jill
Align's 2025 Holiday Deadlines

'Tis the season for all things cozy, yuletide cheer ... and the mad dash to get everything done before HOLIDAY DEADLINES! Aren't you happy you're a photographer right about now? :)
Your clients know that albums make amazing Christmas gifts, but do they know how long the album creation process takes? We want to help YOU help THEM have their albums in hand by the holidays, so here's a refresher on our design turnaround times and an announcement of our holiday print deadlines:
Turnaround times for DESIGNS:
Due to the back-and-forth nature of the design and revision process, there is no one-size-fits-all estimate for how long the design process will take from start to finish. Please allow yourself and your client ample design time (multiple weeks) by placing your design order AS SOON as possible.
Initial designs - Within 4 business days of receiving your order form, deposit, and images
Revision requests - 2 business days after we've received the comments and any additional images or clarifications needed
Final file delivery - 1 business day after the album has been approved AND the final balance has been paid (**see note at bottom of this page)
Our business days for designing are Monday through Friday except for the following holidays:
Thanksgiving - Thursday, November 27 and Friday, November 28, 2025
Christmas - Wednesday, December 24 and Thursday, December 25, 2025
Deadlines for PRINTING:
If you'll also be printing through Align Legacy Books and wish to receive your album in the mail by December 21, 2024, you must send your album to print (i.e. fill out the custom Print Confirmation order form we email you after the design service is paid for) by the following dates:
Friday, November 28** for standard AND rush production turnaround times
Orders placed before 11:59pm November 28 with standard production will ship within 10 business days of the order date
Orders placed before 11:59pm November 28 with RUSH production will ship within 5 business days of the order date
Orders placed after November 28 will ship within 10 business days of the order date (starting the first week of January)
**Important Advice Due to the back-and-forth nature of invoicing, please plan for about 48 hours in between when your design is approved and when you will receive your final files (if you are printing elsewhere) or the link to your custom Print Confirmation order form (if you're printing with us). To skip the invoicing steps and speed up the process, you can:
PHEW! That is A LOT of detail! We're SO excited to help you serve your clients well this holiday season!
Your clients know that albums make amazing Christmas gifts, but do they know how long the album creation process takes? We want to help YOU help THEM have their albums in hand by the holidays, so here's a refresher on our design turnaround times and an announcement of our holiday print deadlines:
Turnaround times for DESIGNS:
Due to the back-and-forth nature of the design and revision process, there is no one-size-fits-all estimate for how long the design process will take from start to finish. Please allow yourself and your client ample design time (multiple weeks) by placing your design order AS SOON as possible.
Initial designs - Within 4 business days of receiving your order form, deposit, and images
Revision requests - 2 business days after we've received the comments and any additional images or clarifications needed
Final file delivery - 1 business day after the album has been approved AND the final balance has been paid (**see note at bottom of this page)
Our business days for designing are Monday through Friday except for the following holidays:
Thanksgiving - Thursday, November 27 and Friday, November 28, 2025
Christmas - Wednesday, December 24 and Thursday, December 25, 2025
Deadlines for PRINTING:
If you'll also be printing through Align Legacy Books and wish to receive your album in the mail by December 21, 2024, you must send your album to print (i.e. fill out the custom Print Confirmation order form we email you after the design service is paid for) by the following dates:
Friday, November 28** for standard AND rush production turnaround times
Orders placed before 11:59pm November 28 with standard production will ship within 10 business days of the order date
Orders placed before 11:59pm November 28 with RUSH production will ship within 5 business days of the order date
Orders placed after November 28 will ship within 10 business days of the order date (starting the first week of January)
**Important Advice Due to the back-and-forth nature of invoicing, please plan for about 48 hours in between when your design is approved and when you will receive your final files (if you are printing elsewhere) or the link to your custom Print Confirmation order form (if you're printing with us). To skip the invoicing steps and speed up the process, you can:
-Authorize us to automatically charge your saved credit card (find this setting at the bottom your Edit Profile page).
-Or pre-purchase Align Credit (in any amount) on your Account Balance page which will be automatically applied to your balance.
PHEW! That is A LOT of detail! We're SO excited to help you serve your clients well this holiday season!
-----------
Blog post written by: Melissa Jill
Blog post written by: Melissa Jill
Michigan Conservatory Wedding Album Design for Jean Smith Photography
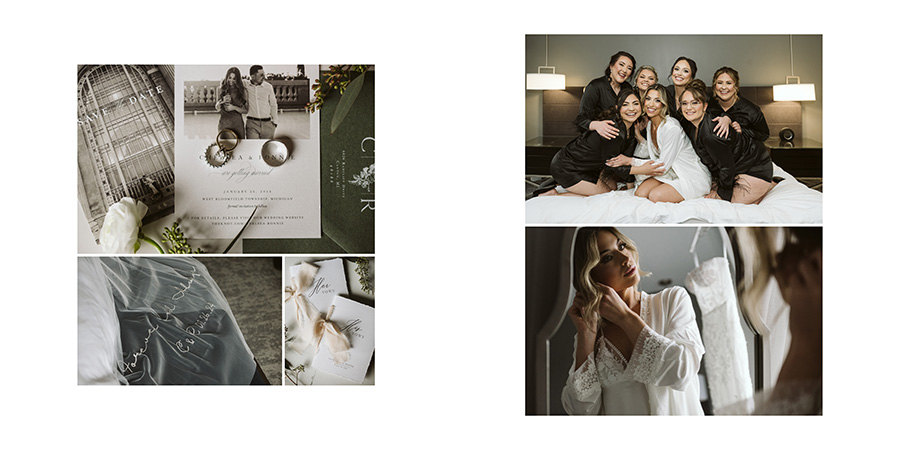
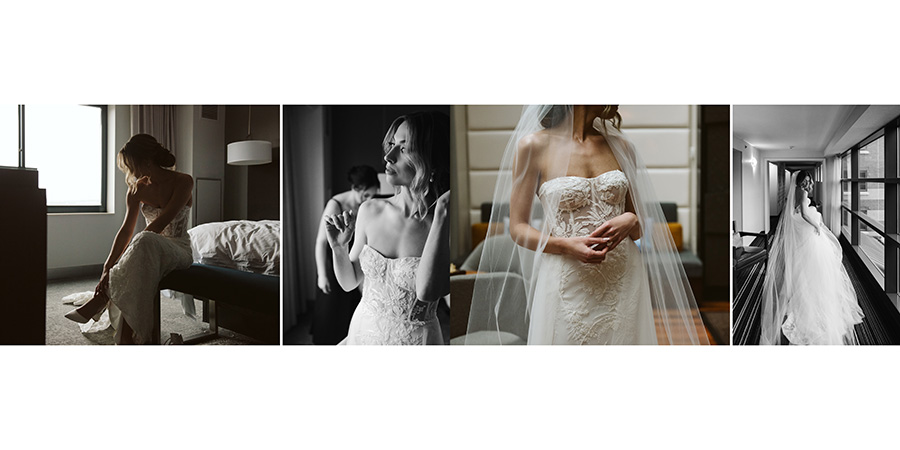
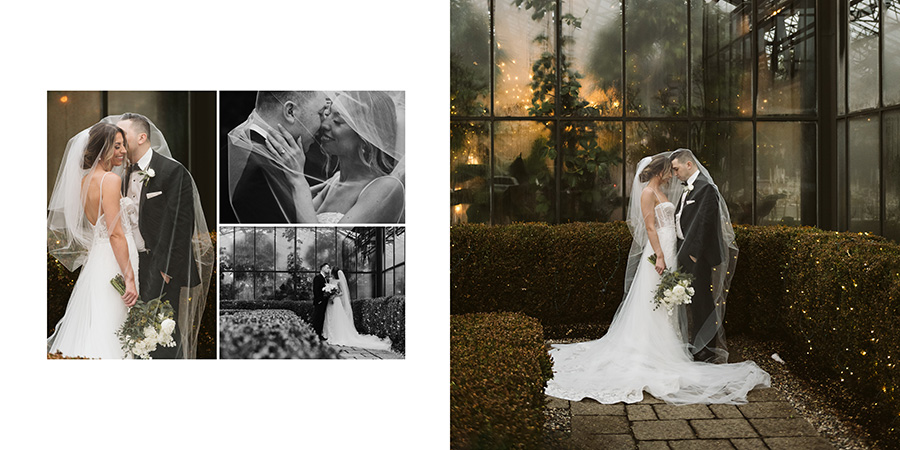
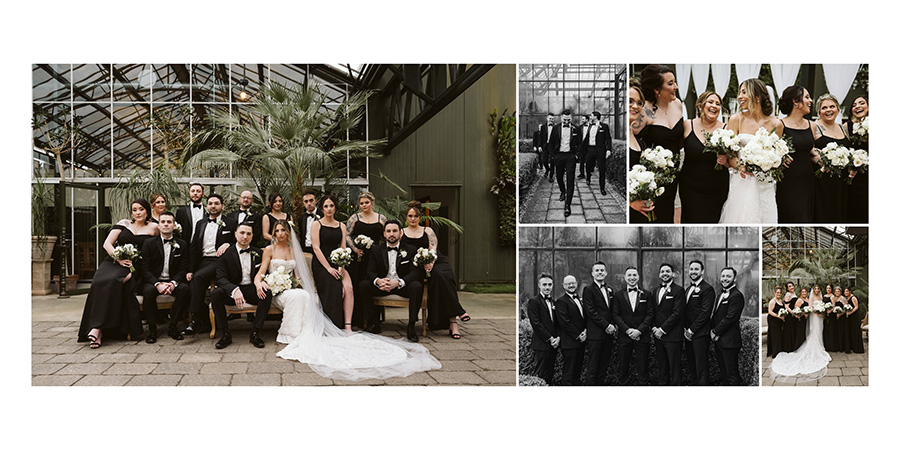
Today we are excited to share with you an absolutely STUNNING design we created for the fabulous Jean Smith -- Michigan wedding photographer extraordinaire! Jean brings a refined eye for light and composition to everything she shoots and she makes our job of telling the story of a wedding day in album form SO FUN.
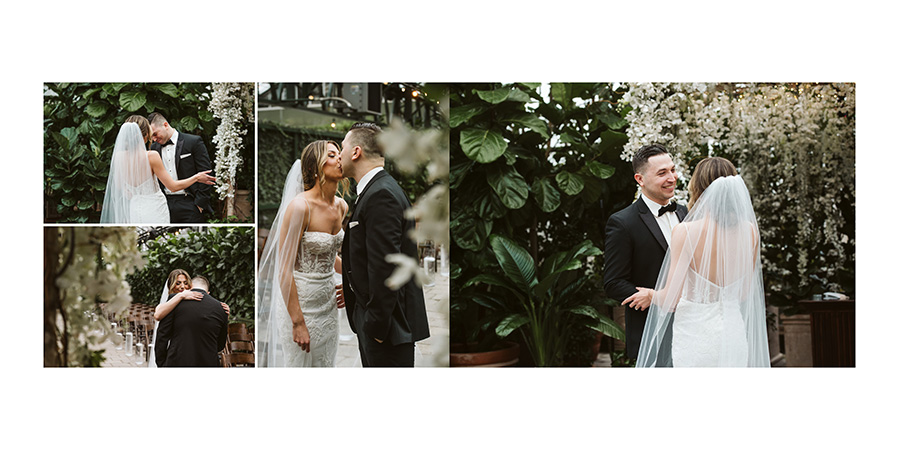
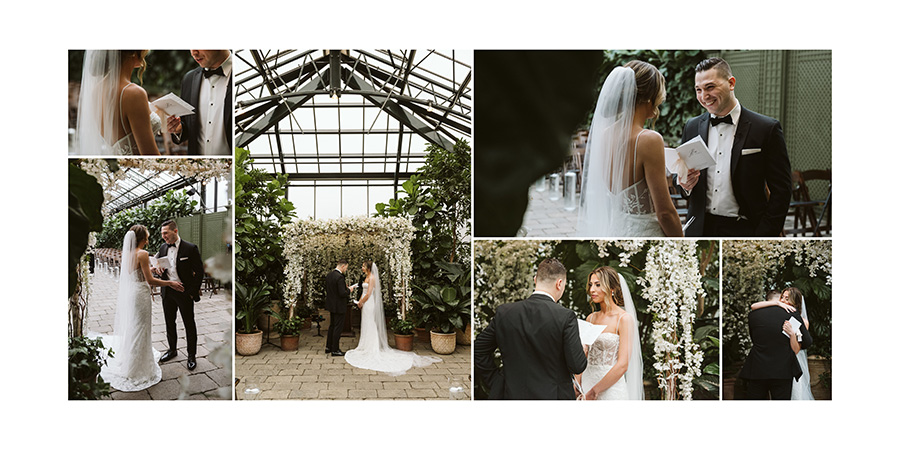
This wedding took place at the most beautiful glass conservatory on the outskirts of Detroit. We are enamored with it and think it made the most interesting location for this high-end event. Plants and light streaming in on all sides -- yes please!
Jean always sends us a mix of color and black and white photos and likes us to mix them in a balanced way throughout the spreads of the design. She typically sends us duplicate versions of many of the images in order to facilitate this -- one in color and one in black and white. We love the result!
Here are a few of our favorite spreads from this lovely design:
To see the design in full, click through the slideshow:
Thank you, Jean, for trusting us with your images for so many years!
Thank you, Jean, for trusting us with your images for so many years!
-----------
Design by: Shannon (View More) // Design style: Classic (View More) // Blog post written by: Melissa Jill
Design by: Shannon (View More) // Design style: Classic (View More) // Blog post written by: Melissa Jill
How To Choose Which Wedding To Feature In Your Sample Album

Hey there, fellow photographers! Melissa Jill here, pro-photographer and founder of Align. I know I've mentioned before how VITAL it is to share our passion for albums with our clients. More specifically, I've talked about how important it is to give our clients a tangible experience by letting them hold a sample album and leaf through the pages.
The truth is, if we want to sell albums, we have to show them! There is great power in studio sample albums. They hold the potential of taking an engaged couple from "mmm ... no thanks" to "umm -- YES PLEASE!"
While I've touched on 5 features every sample album should include, you might still be wondering which of your sessions would be the best to use for your sample album.
Today I am going to break down the top 5 elements to consider when choosing which wedding or portrait session to feature in your sample album!
1 - Feature a favorite.
Duh, right? You know the wedding or portrait session that has you swooning long after the day is over? The one that keeps you up at night because you are so excited about all the details and the beautiful light and how perfectly you feel you captured the love from beginning to end? That's the one! After all, you want to capture more of these types of sessions, right?
2 - Tell a story.
As a wedding photographer, rarely do I have a wedding where I love my photography from each portion of the day. From getting ready to portraits to the ceremony and the reception... pick a wedding (or portrait session) where you love the photos throughout the entire day so that you can tell a compelling story through the design.
3 - Feature clients who are relatable.
The goal is for your potential client to actually SEE themselves in your images. You want them to be able to imagine themselves in the pictures and to vividly create their own wedding experience in their minds as they flip through the pages. So feature a wedding in which the details and the couple might be relatable to the clients you ideally want to attract.
4 - Include a popular venue.
Consider picking a wedding or portrait shoot that showcases a popular venue in your local area. If a client you are meeting with is getting married at said venue or is considering it, think of how persuasive it would be to see the location showcased in such a visually appealing way! And even the clients who are NOT getting married there will probably be familiar enough with the venue to subconsciously feel a sense of connection to it.
5 - Show emotion.
Choose a session from which the portraits are emotionally moving. Appealing to the emotional side of your clients increases the chances they will be drawn into the album and be moved to include one in their package.
Hopefully as you read through these thoughts, the perfect wedding or portrait session came to mind for your next sample album. I hope you're excited to move forward and get that sample made!
To see a wedding I recently chose to feature in my own sample album, click here!
Also, to help even further with your sample album needs, we've created this Resource List for the Top 10 Most Popular Album Companies used by Align clients, along with testimonials from photographers who use each of them. Also included on the list is a general idea of what each company charges for a standard 10x10 album. You can download it for FREE today by clicking here and signing up for an account with Align -- no order necessary! Or if you already have an existing Align account and want a copy of this resource guide, you're welcome to email us for a copy.

-----------
Blog post written by: Melissa Jill
Blog post written by: Melissa Jill