
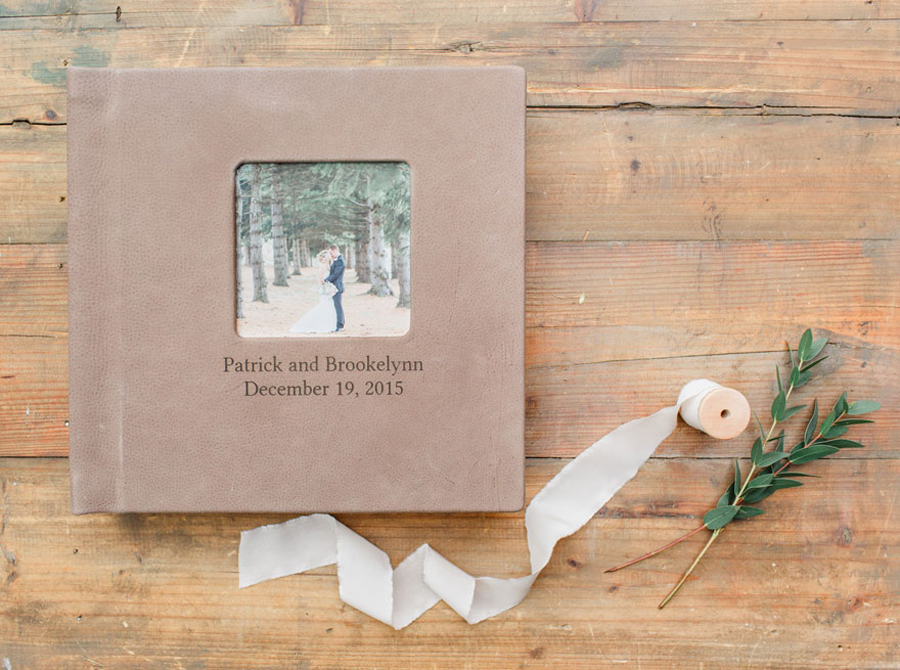
When Should You Update Your Sample Album?

Showing a studio sample album is crucial to selling albums. Seeing and holding a sample album allows clients to visualize their own album in a way that no amount of description can do! Many photographers understand this and create a studio sample album when they first begin offering album. But as their business progresses, they become unsure of when to update it. So how DO you know when it's time to create a new sample album?
Here are four indicators that you might need a new sample album:
1 -- Your style has changed
Photographers may be entrepreneurs, but we're also artists. As such, our style and skill level develop over time. When you reach a point where the images in your sample album no longer represent your current photography, it's time for an update! For example, when I shifted my photography focus from digital to mostly film, my sample albums no longer reflected my work. I got new sample albums and loved the way they were a reflection of my best, most current work!
2 -- Your album offerings have changed
This one might seem like common sense, but it's important! Your sample album is there to provide an example of what you offer. When your clients feel the weight of it, touch the pages, stroke the cover, admire the design -- all of those should be indicative of what their own album would include. So if you change the dimensions, cover materials, etc. of the primary album you offer, you should also get a new sample album to match. This is especially true if you change album companies!
3 -- Your target client has changed
As I mentioned in my blog post, How to Choose Which Wedding to Feature in Your Sample Album, your studio sample should feature a wedding in which the details and couple are relatable to your ideal clients. If your ideal client changes -- if you now want to attract clients who are edgier, more traditional, more whimsical, etc. -- those are the kinds of images you should be showing in your sample album. That way when you have those kind of clients in front of you, they will resonate with the work you show them and be more likely to both book with you AND purchase an album.
4 -- You're tired of your old sample album
Sharing your passion for albums is so important in helping your clients to value them! Your enthusiasm shines through! Similarly, if you're feeling stale and bored with your sample album, that feeling will come through to your clients, as well. So if you look at your studio sample and feel just "meh", refreshing your sample album is sure to revitalize the way you share albums in client meetings!
If any of the four indicators above are true in your business, it would be wise to get a new sample album -- one that represents your style and skill level, your album options, and your ideal client ... and that also makes you excited about offering albums!
If you found this post helpful and would like to receive tips like this straight to your inbox, click here to sign up!
Here are four indicators that you might need a new sample album:
1 -- Your style has changed
Photographers may be entrepreneurs, but we're also artists. As such, our style and skill level develop over time. When you reach a point where the images in your sample album no longer represent your current photography, it's time for an update! For example, when I shifted my photography focus from digital to mostly film, my sample albums no longer reflected my work. I got new sample albums and loved the way they were a reflection of my best, most current work!
2 -- Your album offerings have changed
This one might seem like common sense, but it's important! Your sample album is there to provide an example of what you offer. When your clients feel the weight of it, touch the pages, stroke the cover, admire the design -- all of those should be indicative of what their own album would include. So if you change the dimensions, cover materials, etc. of the primary album you offer, you should also get a new sample album to match. This is especially true if you change album companies!
Studying effectively requires focus and the right tools. One such tool is an essay ai writer, which can help you organize your thoughts and generate ideas for your content. Providing suggestions and improving your writing structure ensures that your essays are coherent and well-organized. This tool can be beneficial when facing writer's block or tight deadlines. Remember, though, that it should complement your efforts rather than replace your critical thinking and creativity.
3 -- Your target client has changed
As I mentioned in my blog post, How to Choose Which Wedding to Feature in Your Sample Album, your studio sample should feature a wedding in which the details and couple are relatable to your ideal clients. If your ideal client changes -- if you now want to attract clients who are edgier, more traditional, more whimsical, etc. -- those are the kinds of images you should be showing in your sample album. That way when you have those kind of clients in front of you, they will resonate with the work you show them and be more likely to both book with you AND purchase an album.
4 -- You're tired of your old sample album
Sharing your passion for albums is so important in helping your clients to value them! Your enthusiasm shines through! Similarly, if you're feeling stale and bored with your sample album, that feeling will come through to your clients, as well. So if you look at your studio sample and feel just "meh", refreshing your sample album is sure to revitalize the way you share albums in client meetings!
If any of the four indicators above are true in your business, it would be wise to get a new sample album -- one that represents your style and skill level, your album options, and your ideal client ... and that also makes you excited about offering albums!
If you found this post helpful and would like to receive tips like this straight to your inbox, click here to sign up!
And exciting news! If you're a photographer who wants to start offering albums without investing hours of guesswork and trial and error -- we have a solution for you! Check out the Album Start-Up Kit and start maximizing your profit today! Note: This Kit INCLUDES a beautiful custom designed sample album!

-----------
Blog post written by: Melissa Jill
Blog post written by: Melissa Jill
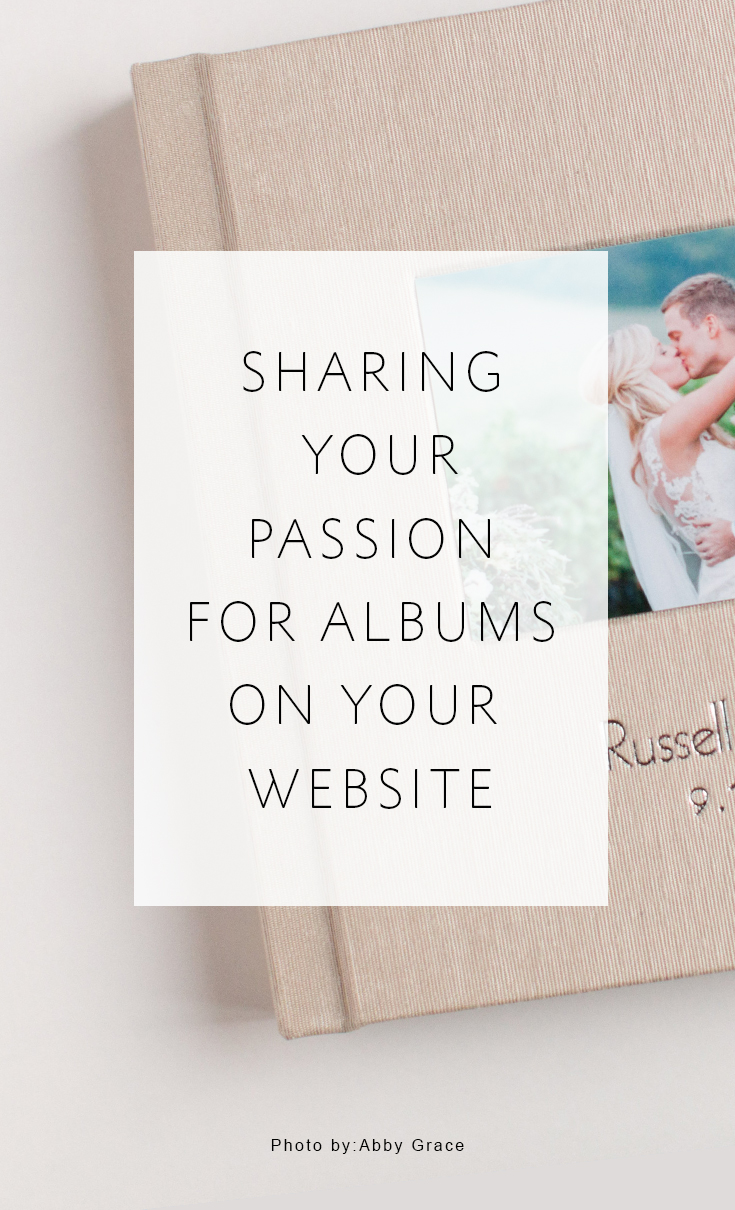
Sharing Your Passion For Albums On Your Website
So many photographers struggle to get their clients to value albums enough to buy one. The reality is that if we want to sell albums, we need to tackle this challenge of establishing the value of an album in the minds and hearts of our clients head on.
I've addressed this in a past post by offering Four Tips for Getting Your Clients to Value Albums and Buy One. And in essence, they all come down to communicating your own PASSION FOR ALBUMS.
Today I want to talk specifically about one of the best ways we can do this: Creating a spot on our websites just for albums!
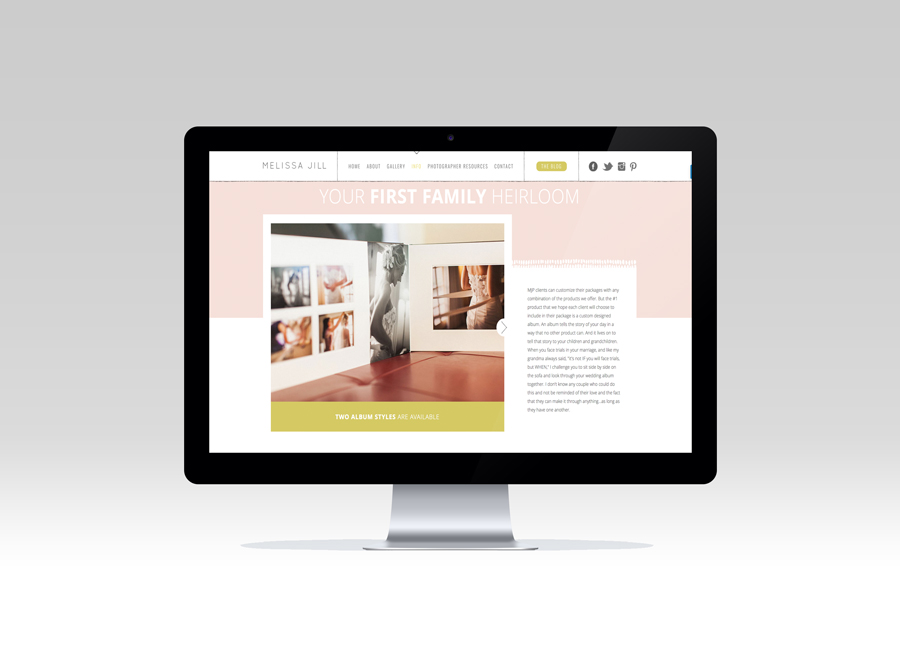
Adding an album section to your website can be a quick and easy task. It can be as simple as constructing a blurb on your "Info" page like I have done for my photography business. I can easily point my audience toward this information within various blog posts in which I reference albums. This helps reinforce my passion for albums to potential clients because chances are when they search for package and pricing information, they will see the album page and will understand up front that a wedding album is the number one product I most want my clients to walk away with. The thought of purchasing one will already be a seed planted in their minds before they even meet with me!
So, what all should this designated page on your website include?
Here are 5 important things to incorporate when sharing your passion for albums on your website:
1 -- Your "WHY"
Whether you are talking about albums in your initial client meeting or are communicating this product/service to your clients through a different avenue, your WHY is always going to be important. I truly believe that an album tells the story of a wedding day in a way that no other product can and lives on to tell that story for generations to come. I make sure to share that belief with my clients throughout my interaction with them in various forms. I encourage you to know exactly what it is you value about albums and then build a strong, clear expression you can share with your clients, both in person and on your website! Feel free to check out my website for some inspiration!
2 -- Album Options
While I believe it is wise to keep your album options simple, I also believe it is important to communicate those options in a way that is easily understood. Spelling out exactly what you offer frees up everyone from unnecessary overwhelm. I have picked out one album size, one cover option and one paper type that I LOVE from my album company, had a sample album created with it, and that is one of the two options I give my clients. The other option is a completely different album from another company -- again with one size, one paper type, and one cover option. Whatever your album options are, showcasing them clearly and in an easily consumable way will make choices easier on your clients!
3 -- Noteworthy Details
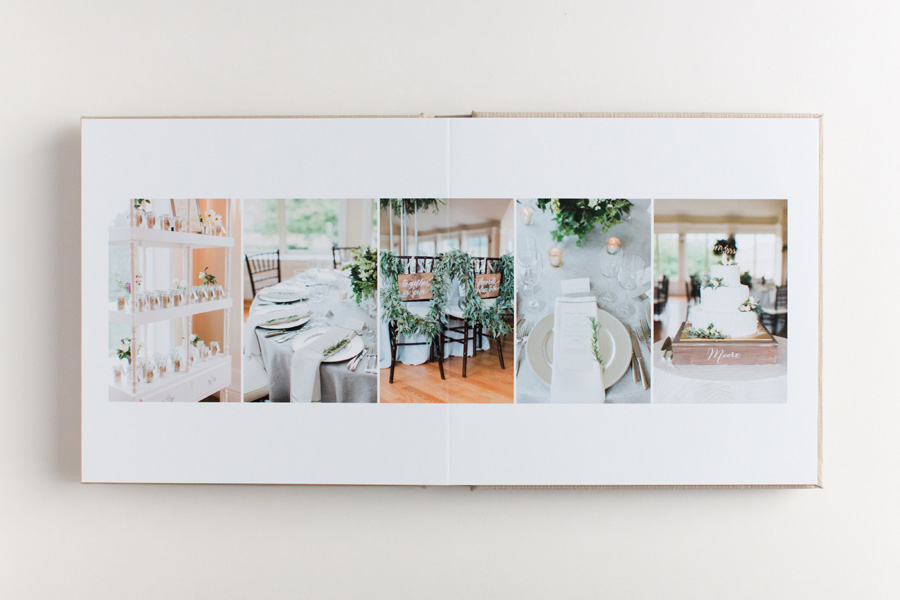
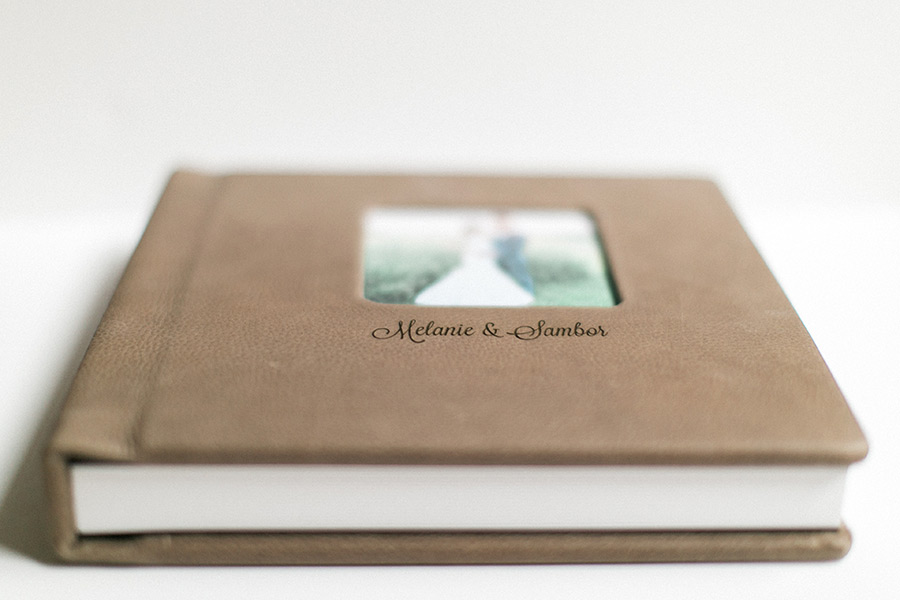
If there are any specific details that deserve a special shout out for each of your album options and/or the album company you use, this is a great place to do so! For example, when sharing about the Queensbury album option I offer my clients, I mention it is a high end, leather covered album that is custom made in New Zealand. I also highlight specific distinguishing features such as the textured white matte pages of the album. Each album is unique and has special characteristics that might attract potential clients. This designated space on your website is a great place to highlight these features!
4 -- Additional Album Options
Are parent albums an option within your packages? Gift books? These are all things that are worth mentioning when sharing your album information and all the various options available for purchase on your website. The more you can educate your potential clients about what is available to them within your products and services, the better!
5 -- Album Images
When it comes to helping clients visualize the product you are hoping they will purchase, words can only do so much. Using high quality images that show off the beauty of your albums is essential! It is the online equivalent to sharing your sample album at the initial client meeting. If you are in search of inspiration for some ideas on how to take photographs of your albums efficiently, look no further than this post where I share some fun tips and tricks for photographing your albums!
Hopefully this has helped give you some good ideas on what is important to include on your website in order to communicate your passion for albums effectively!
I've addressed this in a past post by offering Four Tips for Getting Your Clients to Value Albums and Buy One. And in essence, they all come down to communicating your own PASSION FOR ALBUMS.
Today I want to talk specifically about one of the best ways we can do this: Creating a spot on our websites just for albums!
Adding an album section to your website can be a quick and easy task. It can be as simple as constructing a blurb on your "Info" page like I have done for my photography business. I can easily point my audience toward this information within various blog posts in which I reference albums. This helps reinforce my passion for albums to potential clients because chances are when they search for package and pricing information, they will see the album page and will understand up front that a wedding album is the number one product I most want my clients to walk away with. The thought of purchasing one will already be a seed planted in their minds before they even meet with me!
So, what all should this designated page on your website include?
Here are 5 important things to incorporate when sharing your passion for albums on your website:
1 -- Your "WHY"
Whether you are talking about albums in your initial client meeting or are communicating this product/service to your clients through a different avenue, your WHY is always going to be important. I truly believe that an album tells the story of a wedding day in a way that no other product can and lives on to tell that story for generations to come. I make sure to share that belief with my clients throughout my interaction with them in various forms. I encourage you to know exactly what it is you value about albums and then build a strong, clear expression you can share with your clients, both in person and on your website! Feel free to check out my website for some inspiration!
2 -- Album Options
While I believe it is wise to keep your album options simple, I also believe it is important to communicate those options in a way that is easily understood. Spelling out exactly what you offer frees up everyone from unnecessary overwhelm. I have picked out one album size, one cover option and one paper type that I LOVE from my album company, had a sample album created with it, and that is one of the two options I give my clients. The other option is a completely different album from another company -- again with one size, one paper type, and one cover option. Whatever your album options are, showcasing them clearly and in an easily consumable way will make choices easier on your clients!
3 -- Noteworthy Details
If there are any specific details that deserve a special shout out for each of your album options and/or the album company you use, this is a great place to do so! For example, when sharing about the Queensbury album option I offer my clients, I mention it is a high end, leather covered album that is custom made in New Zealand. I also highlight specific distinguishing features such as the textured white matte pages of the album. Each album is unique and has special characteristics that might attract potential clients. This designated space on your website is a great place to highlight these features!
4 -- Additional Album Options
Are parent albums an option within your packages? Gift books? These are all things that are worth mentioning when sharing your album information and all the various options available for purchase on your website. The more you can educate your potential clients about what is available to them within your products and services, the better!
5 -- Album Images
When it comes to helping clients visualize the product you are hoping they will purchase, words can only do so much. Using high quality images that show off the beauty of your albums is essential! It is the online equivalent to sharing your sample album at the initial client meeting. If you are in search of inspiration for some ideas on how to take photographs of your albums efficiently, look no further than this post where I share some fun tips and tricks for photographing your albums!
Hopefully this has helped give you some good ideas on what is important to include on your website in order to communicate your passion for albums effectively!
If you are new to albums all together and could benefit from even more help creating an album page on your website, check out our Album Start-Up Kit! Included in the Kit is text you can customize for your website and blog. Use our worksheet to help you develop your own personal "why" that will serve as a compelling way to communicate the value of albums to your clients, and then choose between one of two copy-and-paste text options that effectively overcome the common question of why albums "cost so much" in a non-salesy way.

-----------
Blog post written by: Melissa Jill
Blog post written by: Melissa Jill
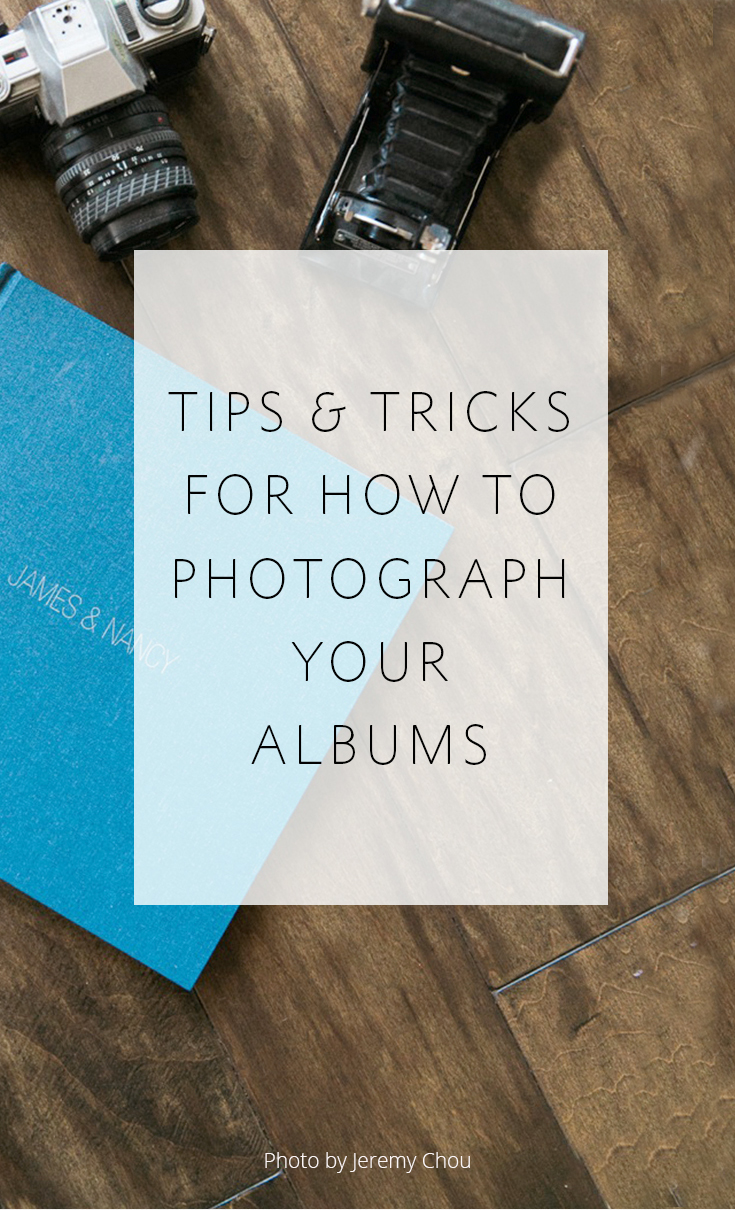
Tips & Tricks For Photographing Your Albums
Hey guys! Melissa Jill here, owner of Align. We've talked in the past about the importance of sharing your passion for albums -- EVERYWHERE. You can't sell albums effectively and get them into the hands of all of your clients unless you are sharing your heart for this product and putting examples in front of them again and again. One of the most effective ways you can do this is through putting beautiful images of albums consistently out there on every channel that your clients might browse or interact with: your website, Instagram, Instagram Stories (Instagram Story highlights is one of our favorite places to showcase albums because you can flip through them in a video while you talk about them and really give your clients a good look at an album in action!!), etc.
So taking a moment to photograph each and every beautiful album that comes through your studio is SO valuable. Then you will have a slew of stunning examples to share! But photographing albums in a way that shows off their quality and value can be tricky. Today we are going to share some tips for photographing albums effectively!
There are a few different things to consider when approaching the task of photographing albums. First, as a photographer myself, I know your time is limited and valuable. Photographing albums, while worthwhile and beneficial, is not something that should take up a ton of your time. In an effort to demystify the process of photographing albums, I am excited to share a short video that Abby Grace was kind enough to create for us on her album photographing strategy. It is both simple and efficient.
We LOVE how Abby has systematized the process of photographing each of her client albums!
By way of review -- here is a list of Abby's 5 Steps to an Efficient Album Photo Shoot:
1 -- Set-up
Set up your tripod with camera pointed straight down at a 90 degree angle. This tripod works great!
2 -- Lighting
Make sure you are in an area with plenty of natural light! Create a make-shift reflector. Use 3 white foam poster boards taped together to make a 3/4 reflector. This helps to lessen those pesky shadows.
3 -- Background
Place a cheap, flimsy white poster board directly underneath the camera and lay the album on top of it for a clean backdrop.
4 -- Frame
Put your camera on "live preview" mode to make sure everything is lined up evenly and completely flat. This will minimize the post-production cropping/editing.
5 -- Shoot
Once everything is nailed into focus, turn the camera to manual focus to take the first photo. Without moving the camera at all, turn the page and take the next photo. Move through the entire album this way. Since everything is composed exactly the same way, you can batch the images and apply edits to the entire batch. Everything is super automated and easy with this system, which makes it possible for you to shoot 3-4 albums within 20 minutes!
You can see just how clean and lovely the outcome of this process is by visiting some of Abby's finished work that we've featured here on our blog in the past!
above image by Abby Grace Photography

above image by Abby Grace Photography
While the above method is super-efficient and simple, there are also other ways to creatively style your albums that can really show off their unique features and personalities. Here are just a few that we love:
1 -- Use a textured background to add depth and character to the image. An album placed upon something that has its own shadows and light can really enhance the beauty and simplicity of the album. Some great materials to utilize are wood, tulle or textured fabric.

above image by Melissa Jill Photography
2 -- Try posing the album! Photograph the details at different angles. Take some shots of the album standing up, where the pages are showcased. Take some close ups of the cover, and the fine details of various pages. Get creative with perspectives! Sometimes just showing portions of the spreads along with a textured background creates a lot of interest.
2 -- Try posing the album! Photograph the details at different angles. Take some shots of the album standing up, where the pages are showcased. Take some close ups of the cover, and the fine details of various pages. Get creative with perspectives! Sometimes just showing portions of the spreads along with a textured background creates a lot of interest.
above image by Brittany Thomas Photography
3 -- Add props to make it more interesting. Try setting up the album within the box it came in, along with some tissue paper and ribbon. Some other ideas would be to use cover fabric swatches, flowers, leaves, pine cones, etc to style the image. Using an actual detail from the wedding is also a way to help tell the story held within its pages.
3 -- Add props to make it more interesting. Try setting up the album within the box it came in, along with some tissue paper and ribbon. Some other ideas would be to use cover fabric swatches, flowers, leaves, pine cones, etc to style the image. Using an actual detail from the wedding is also a way to help tell the story held within its pages.
above image by Caroline Logan Photography
4 -- Photograph the album fulfilling its purpose. Which means, take pictures of someone sitting down with the album and pouring over the pages. You can add texture with a blanket or some kind of fabric within the shot. This not only adds depth and dimension to the image but also personalizes it and invites the viewer to imagine themselves cozied up with their very own album, soaking in the memories they will treasure for life!
4 -- Photograph the album fulfilling its purpose. Which means, take pictures of someone sitting down with the album and pouring over the pages. You can add texture with a blanket or some kind of fabric within the shot. This not only adds depth and dimension to the image but also personalizes it and invites the viewer to imagine themselves cozied up with their very own album, soaking in the memories they will treasure for life!

above image by Melissa Jill Photography
5 -- Use blank space and the rule of thirds. The album doesn't need to be centered perfectly and doesn't need much more than it's own beautiful face! Try holding the album up against a white wall where you include the hands of a nearby willing person as props! This creates a very clean and simple image, where the album is the star of the show.
5 -- Use blank space and the rule of thirds. The album doesn't need to be centered perfectly and doesn't need much more than it's own beautiful face! Try holding the album up against a white wall where you include the hands of a nearby willing person as props! This creates a very clean and simple image, where the album is the star of the show.
above image by Melissa Jill Photography
Photographing albums doesn't have to be an overwhelming or time consuming task. In fact, with a little bit of intention and creative thought, it can be kind of fun! Plus, the benefits of featuring a gorgeous album in a truly appealing way can be huge! Just like sharing sample albums with our clients during an initial client meeting, consistently sharing each clients' album through visually stunning images can be so helpful for getting clients to value them as much as we do!
Photographing albums doesn't have to be an overwhelming or time consuming task. In fact, with a little bit of intention and creative thought, it can be kind of fun! Plus, the benefits of featuring a gorgeous album in a truly appealing way can be huge! Just like sharing sample albums with our clients during an initial client meeting, consistently sharing each clients' album through visually stunning images can be so helpful for getting clients to value them as much as we do!
If you found this post helpful and would like to receive tips like these straight to your inbox, click here to sign up!
-----------
Blog post written by: Melissa Jill
Blog post written by: Melissa Jill
Ordering and Packaging the Wedding Album
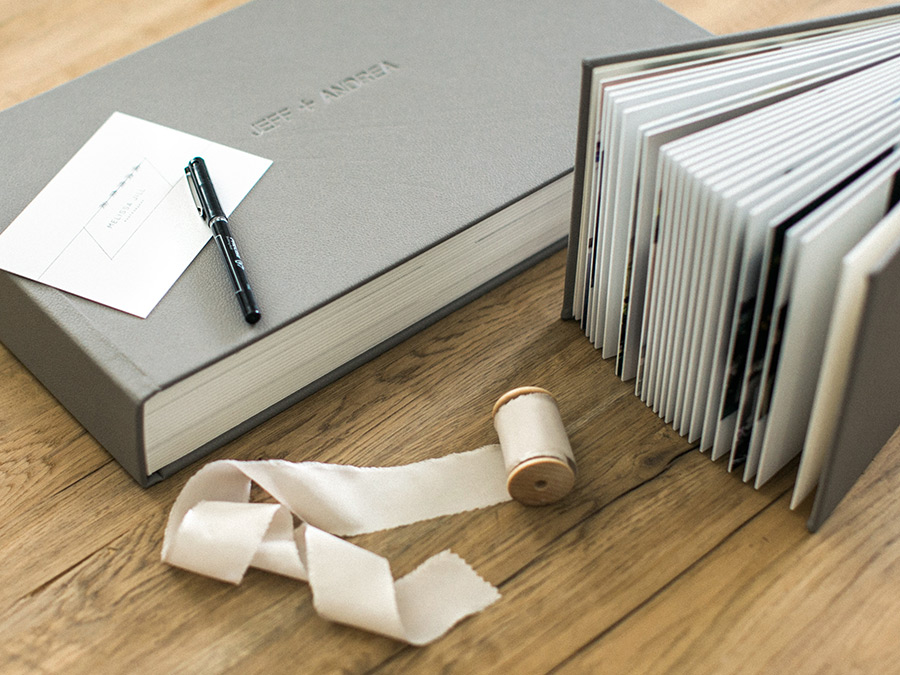
So your client approved the album design. Now what?
The entirety of the album workflow can feel like such a HUGE process. At this point, the finish line is in sight, but somehow the last step or two in the album production marathon can cause frustration. Why? Because we are so consumed with the NEXT shoot, the next exciting venture, and getting a client's album order placed for a wedding we shot weeks or months ago isn't the most glamorous of tasks. But it has to be done and we need a manageable workflow to make sure the order gets placed and the album turns out beautifully. After all this work, it's important that the final album is something we are proud and excited to deliver to our client! It will forever be a reminder of their love for one another and will also be the last impression we make on them. No pressure! haha! :)
Every photographer's workflow will look a little different, but I wanted to share mine by way of example:
1 -- Touch Up Any Additional Images
Many of the photos included in the album design are touched up and ready to go, but I like to take a quick look through the final design to make sure each spread, and the editing of the images on them, looks cohesive. Occasionally I will need to open an image and retouch it to make sure everything is perfect. Perfectionism is unnecessary when it comes to preparing proofs, but when we know that a photo is forever going to be memorialized in a couple's wedding album, perfectionism is warranted. I typically request layered .psd files from Align in order to allow me to individually edit photos on their own layers before flattening. The other option I sometime use, is sending my designer the touched-up versions of a handful of images to swap out in the design before approval.
2 -- Place the Order with the Album Company
This eventually ends up being a pretty straight-forward step, but there can be two hang-ups. Initially it can be tricky to learn how each album company's ordering system works. But once you get through the initial learning curve, it becomes second nature. The main hang-up is not having all of the information you need from the client. Do you know what cover material they want? Is there a cover photo included? How do they want their names to appear if there is any type of engraving? It's important to ask these questions up front so you're not having to email the client to gather these final bits of information when you're sitting down to place the order. We recommend our Album Workflow Email Templates that will help you make sure this important step is already done by the time you sit down to place the order!
3 -- Quality Control, Packaging and Shipping
I always have the album company send the album straight to me so I can check it over and repackage it before shipping it on to my client. Occasionally I'll discover an error and am able to catch it and get it fixed before the client sees it. And it's a great touch to repackage the album with some of your own branding materials. Ribbon, stickers with your logo, and a hand-written notecard elevate the product and make it cohesive with your brand. And don't forget to take a few photos of the finished album for your own marketing purposes! Plaster those babies all over your website and instagram account! They are SO valuable in sharing your passion for albums and drawing clients to you!
AHHHH -- There's nothing quite like holding a finished wedding album in your hands. For me it provides such a sense of accomplishment knowing how much work I put into telling the couple's unique story, and thinking about how the album will be passed on to generations to come.
If you're looking to simplify and streamline your client communication, making the whole album process -- including all the little steps like getting your client's final preferences on the album cover, materials, etc. -- quicker and easier, you might consider looking into our album workflow email templates. Included are 8 pages worth of email templates for different points throughout your album workflow covering the communication mentioned above plus more! They're a huge time-saver and will help you make sure nothing falls through the cracks!
-----------
Blog post written by: Melissa Jill
Blog post written by: Melissa Jill
Strategies for Designing Parent Albums
above photo by Rebecca Sehn
Last week we talked a little bit about parent albums and the benefits for offering them. In that post, we touched on how offering exact duplicate copies of the bride & groom's album requires very little extra work for photographers because the design work is already done! While that strategy keeps things simple, some clients desire to have the ability to customize their parent albums.
So what is the best approach when your client is asking for alterations to the original design for their parent albums? Today we are going to break down the design/revision strategies successfully used here at Align to help photographers just like you painlessly create multiple album designs for the same wedding...without anyone losing their minds!
Here is a list of how Align can help you maximize your profits with minimal extra work for you, the busy photographer!
1. Duplicate copy
The most direct and simple option is that clients order an exact duplicate copy of the bride and groom's design, typically just in a smaller size that has the same proportions. This would be appropriate when there are NO requests for modifications. Many album printing companies will even allow you to order a smaller album using the exact same design files you uploaded for the large version (i.e. using 12x12-sized layouts to print an 8x8 copy as well). However, if your album company requests separate files for each version, just reach out to your Align designer! Depending on the size you need, we may be able to export the new files immediately or we can use another revision round to resize your design.
2. Take advantage of those unused revisions
Every Align Album Design order includes 3 rounds of revisions in the price. Once the bride & groom's design is approved, you can use any unused revision rounds to allow the parents to submit their changes. As long as you don't use more than 3 revision rounds total, there is no additional charge! But if you need more than that, the cost is $50/round which is still typically less expensive than placing a new album design order.
3. Multiple versions of a single spread
Alternatively, if you know for sure that ONLY ONE spread will be changing between the versions (such as the family portrait spread), we could simply design multiple versions of that one spread from the start (at our usual $8/spread price). For example if you need three versions of a 15 spread album, Align could actually design/bill/deliver 17 spreads total. And then you would place three separate orders with your print company and just switch out which version of the family portrait spread you upload to them.
4. Separate design orders
Some clients like to place separate design orders for each album. This is the best method if any of the following circumstances are in play concerning the albums: they utilize different image collections, they have different dimension ratios, they require different design styles, they won't have many spreads in common, etc. This is also the method to use when you simply want a fresh start after you finish the original design.
As you can see, depending on which approach best fits your workflow/client needs, there is a way to keep the design work simple while still giving your clients exactly what they want. There is nothing quite as satisfying as knowing you have delivered an amazing product and service to your client while paying close attention to their unique requests. At Align, we are more than happy to help you achieve this end goal!
We hope you've found these tips helpful!
----------> If you want to give outsourcing a try, click here to find out more about the design styles that Align offers. We have 3 standard design styles but can definitely customize to meet most needs. So don't hesitate to send us examples of designs you like and let us know what your preferences are, and we will design to those specifications. After you take a look at our design styles to find out which one would work best for you, click here to sign up for an account with Align. When you do so, we'll send you a free welcome gift -- our "Top 10 Most Popular Album Companies" Resource List. That way you can find out which album printing & binding companies are the most popular among photographers who use Align, and more importantly, WHY. We'd love to be a part of creating beautiful heirloom albums for your studio and clients!
----------> If you want to give outsourcing a try, click here to find out more about the design styles that Align offers. We have 3 standard design styles but can definitely customize to meet most needs. So don't hesitate to send us examples of designs you like and let us know what your preferences are, and we will design to those specifications. After you take a look at our design styles to find out which one would work best for you, click here to sign up for an account with Align. When you do so, we'll send you a free welcome gift -- our "Top 10 Most Popular Album Companies" Resource List. That way you can find out which album printing & binding companies are the most popular among photographers who use Align, and more importantly, WHY. We'd love to be a part of creating beautiful heirloom albums for your studio and clients!
And exciting news! If you're a photographer who wants to start offering albums without investing hours of guesswork and trial and error -- we have a solution for you! Check out the Album Start-Up Kit and start maximizing your profit today!
-----------
Blog post written by: Melissa Jill
Blog post written by: Melissa Jill